Set up your MDM account: Google Workspace
| Important: Every effort has been made to provide information that is current and accurate. While this information is considered to be correct at the date of publication (September, 2023), changes in content may impact the accuracy. |
Set up Destiny Resource Manager Google Workspace admin role
-
Log in to Google Workspace at https://admin.google.com
-
In the left-hand menu, select Account > Admin roles.
-
At the top of the page, click Create new Role.
-
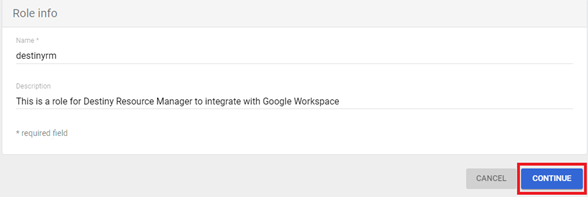
Under Role info, enter a Name and Description, and then click CONTINUE.
-
Select the following Admin Console privileges (all child privileges will also be selected):
-
Organizational Units/Read
-
Mobile Device Management/Manage Device Settings
-
Chrome Management/Settings/Manage Chrome OS Devices
-
Chrome Management/Settings/Manage Chrome OS Device Settings
-
Reports
-
-
Select the Admin API privilege, Organization Units/Read.
-
Click CONTINUE.
-
Click CREATE ROLE.
Set up Destiny Resource Manager Google Workspace user
-
In the left-hand menu, select Directory > Users.
-
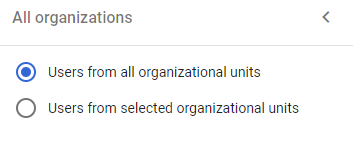
Under All organizations, select Users from all organizational units.
-
In the left panel, click Add new user.
-
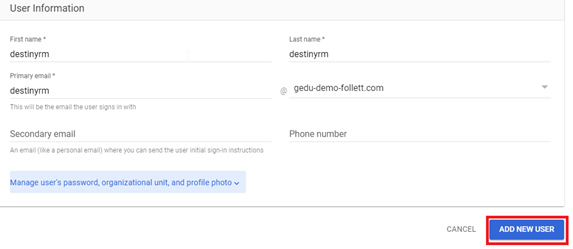
The User Information form appears. Enter the following information:
-
First name
-
Last name
-
Primary email
-
-
Click ADD NEW USER.
-
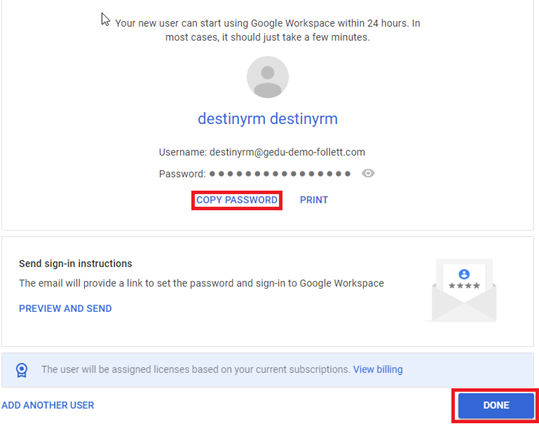
In the confirmation window, if you want to copy and save the password, click COPY PASSWORD.
-
Click DONE.
-
On the Admin roles and privileges page, search for the destinyrm user just added, then click to enter the user window.
-
Go to Admin roles and privileges, then click ASSIGN ROLES.

-
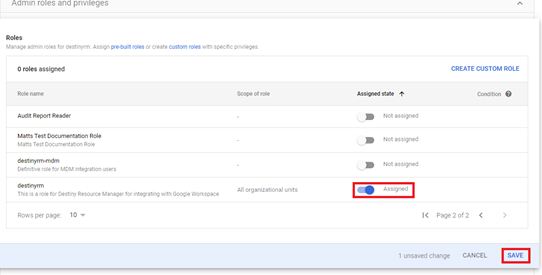
In the pop-up, browse to the destinyrm role in the list, toggle the Assigned state to Assigned, and then click SAVE.
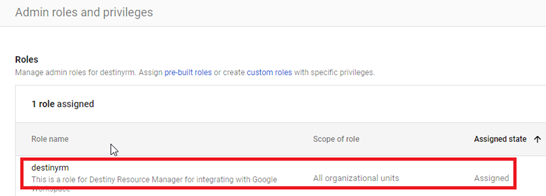
Note: The destinyrm role is now assigned to the destinyrm user.
Set up Google Cloud service account in Google Cloud console
-
Log in to Google Cloud Console: https://console.cloud.google.com/
-
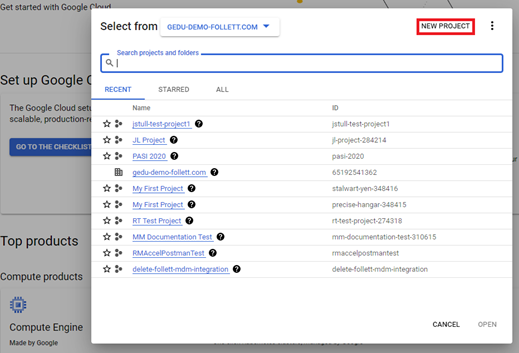
On the cloud console main page, click the Select a project drop-down, then on the pop-up, click NEW PROJECT.
-
On the New Project page, enter the project name as destinyrm, select the Organization and Location you want, and then click CREATE.
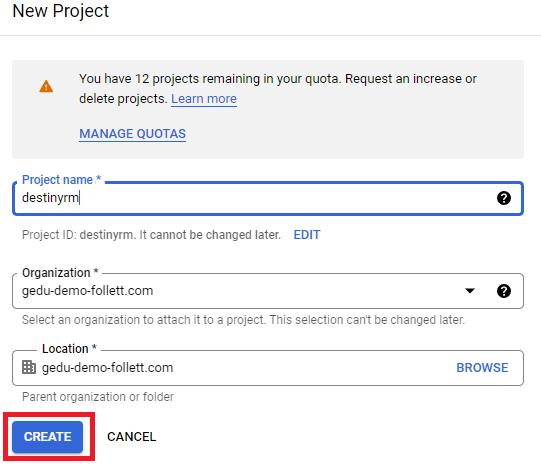
Note: You now have your own Organization and Location. -
On the Google Cloud main page, click the projects drop-down, then select the destinyrm project.
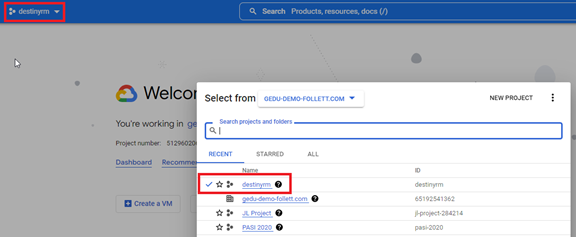
-
On the project main page, click API APIs & Services.
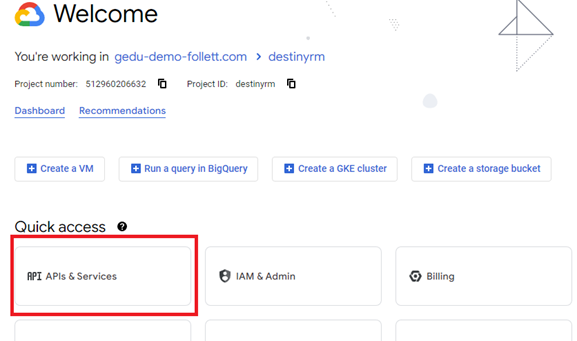
-
On the APIs & Services page, click + ENABLE APIS AND SERVICES.
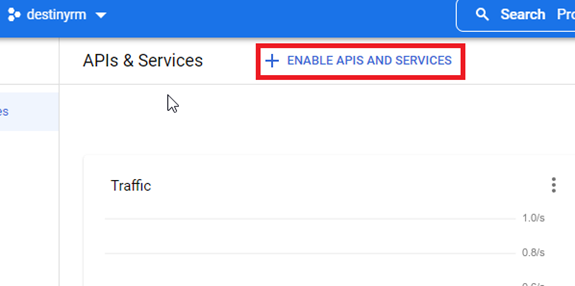
-
On the API Library page, search for admin sdk api.

-
In the search results, click Admin SDK API.

-
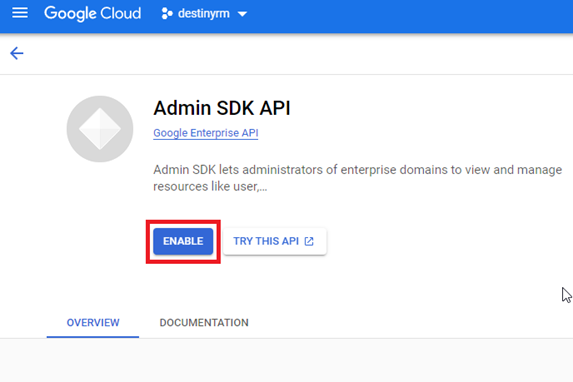
On the Admin SDK API page, click ENABLE.
-
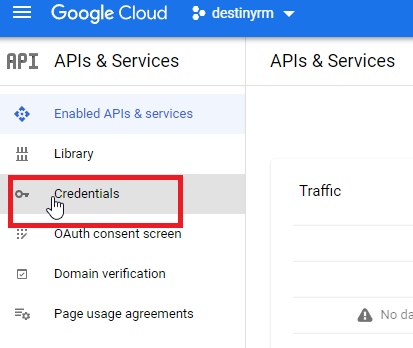
On the APIs & Services page, in the left navigation bar, click Credentials.
-
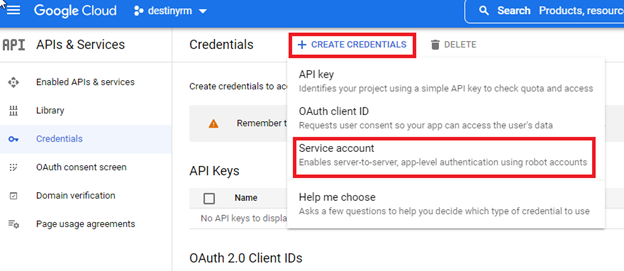
On the next page that appears, click + CREATE CREDENTIALS, then select Service account.
-
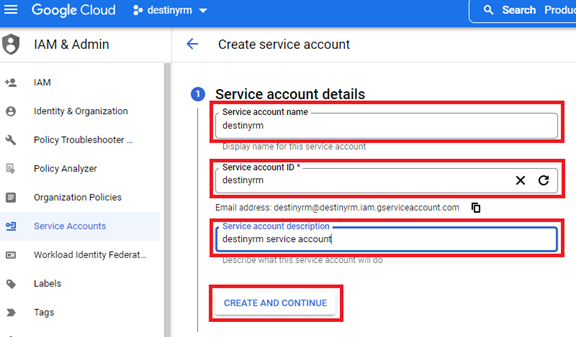
On the IAM & Admin page, enter the information below, then click CREATE AND CONTINUE.
-
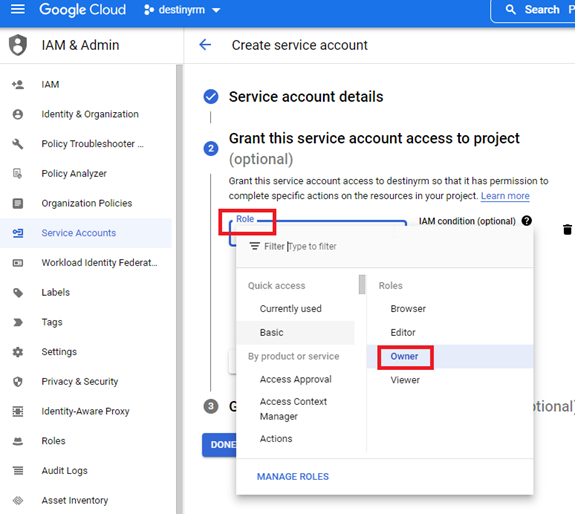
In Step 2, click the Role drop-down, then select Owner.
-
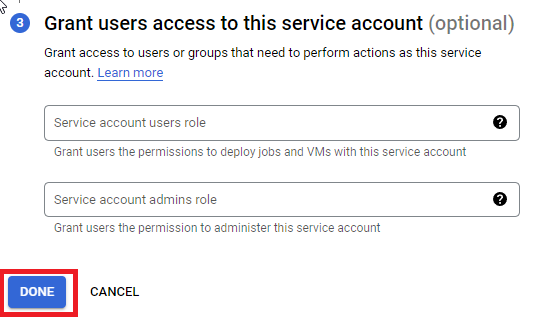
In step 3, click DONE.
-
On the next page that appears, click the destinyrm service account link.

-
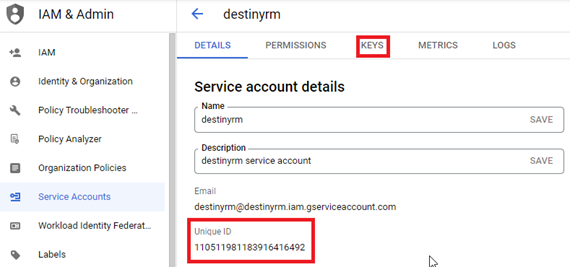
On the Service Account page, record the Unique ID value for later use, then click the KEYS tab.
-
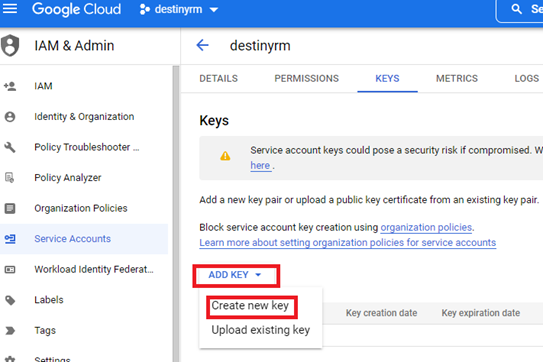
In the Keys section, click the ADD KEY drop-down, and select Create new key.
-
In the pop-up, select the JSON option, then click CREATE.
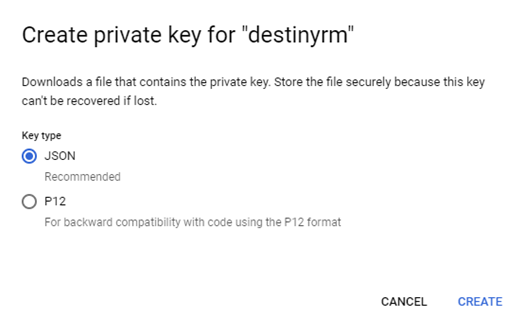
The JSON key file downloads, and the following pop-up appears.

Note: Other keys can be created, but each key can only be downloaded once.
Grant API permissions to service account
-
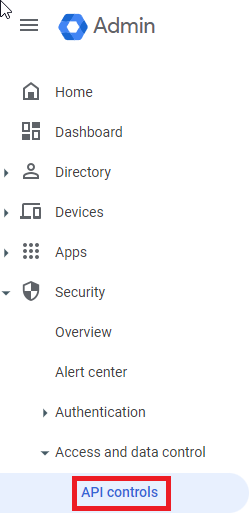
Open the Google Admin Console again (https://admin.google.com). In the left navigation tree, select Security > Access and data control > API controls.
-
On the API controls page, scroll to the bottom, and then click MANAGE DOMAIN WIDE DELEGATION.

-
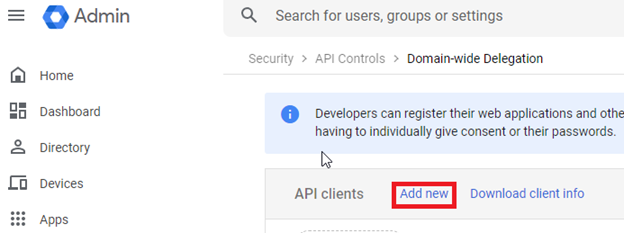
On the Domain-wide Delegation page, click Add new.
-
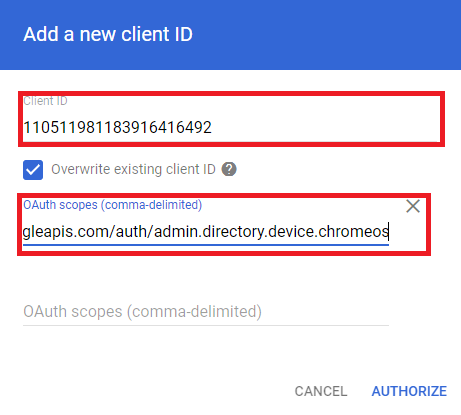
In the Add new client ID pop-up, enter the Unique Client ID value you recorded earlier, add the OAuth scopes listed below, then click AUTHORIZE.
OAuth scopes to add:
https://www.googleapis.com/auth/admin.directory.orgunit.readonly,
https://www.googleapis.com/auth/admin.directory.user.readonly,
https://www.googleapis.com/auth/admin.reports.audit.readonly,
https://www.googleapis.com/auth/admin.directory.device.chromeos,
https://www.googleapis.com/auth/admin.directory.device.chromeos.readonly
